Being a financially conscious bride I’ve chosen to complete many of the decorative requirements of my wedding myself. One of those (incidentally one of the cheapest of my DIY endeavors) is the ring pillow. Pintrest abounds already with DIY instructions on how to make a ring pillow, but what’s one more set? And so, dear reader and crafter, here is my method of ring pillow making.
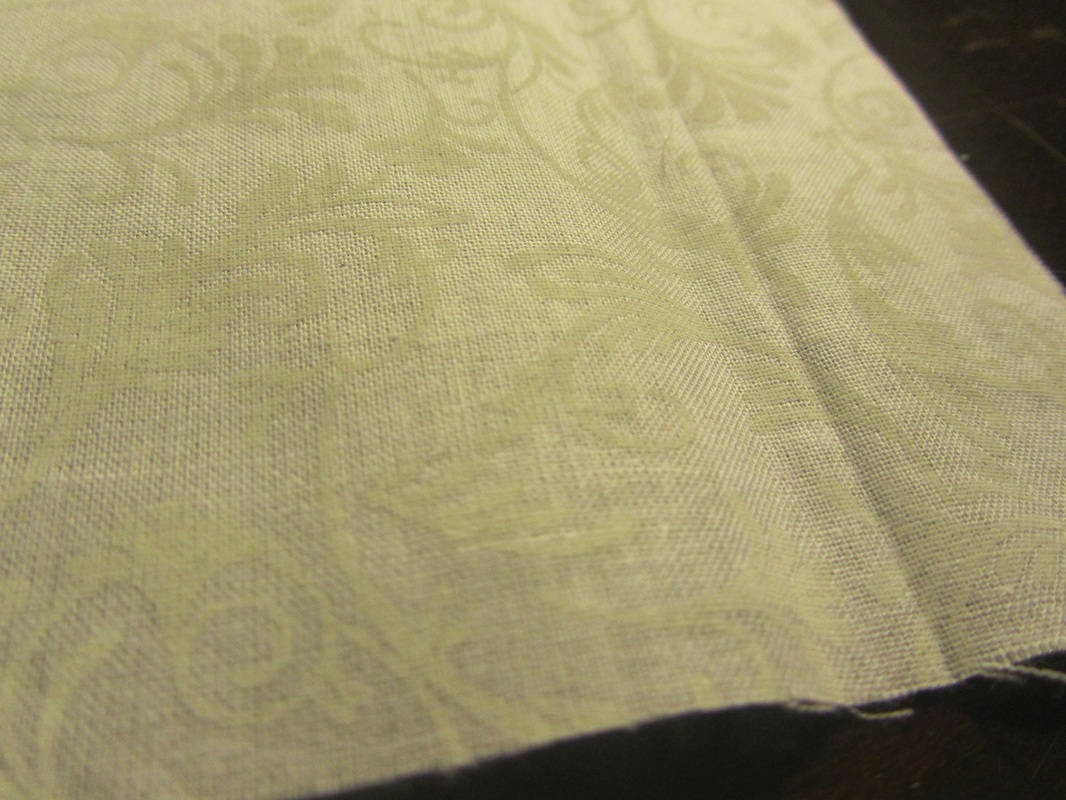
Step 1: Obtain fabric. While perusing wedding pillow designs on Pintrest, I had the good fortune of remembering a quilting square of white flocked cotton in my sewing box left over from another project. One less thing to buy and I even had enough to line a basket from the basement for the start of my flower girl basket as well!
Step 1: Obtain fabric. While perusing wedding pillow designs on Pintrest, I had the good fortune of remembering a quilting square of white flocked cotton in my sewing box left over from another project. One less thing to buy and I even had enough to line a basket from the basement for the start of my flower girl basket as well!
Step 2: Cut the fabric into two equal squares; I made mine 7.5” x 7.5” so I ended up with a 7” x 7” pillow with a ¼” seam allowance.
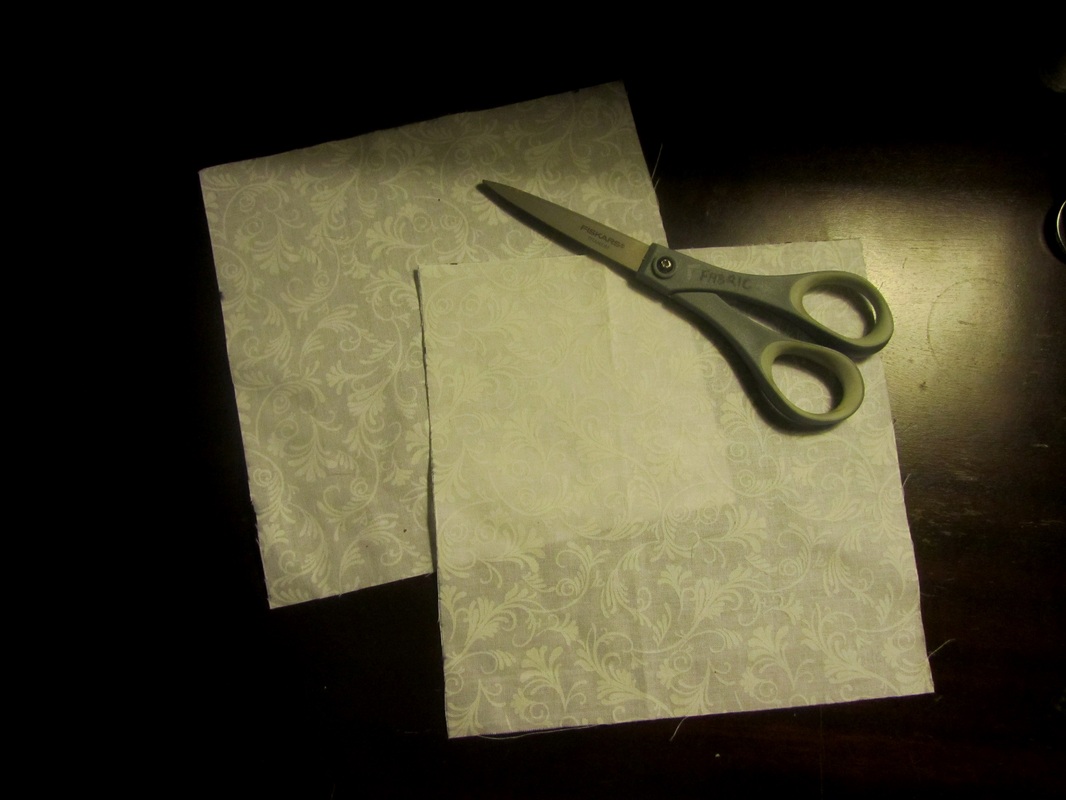
Step 3: Place the fabric right side to right side and sew together three of the edges, forming a pocket.
Step 4: Flip the pocket inside out so the seams are inside and fill with cotton wool. Frugal crafter’s tip: I obtained my filling cotton from an old pillow I had once cut into to make a stuffed bear for a friend.
Step 4: Flip the pocket inside out so the seams are inside and fill with cotton wool. Frugal crafter’s tip: I obtained my filling cotton from an old pillow I had once cut into to make a stuffed bear for a friend.
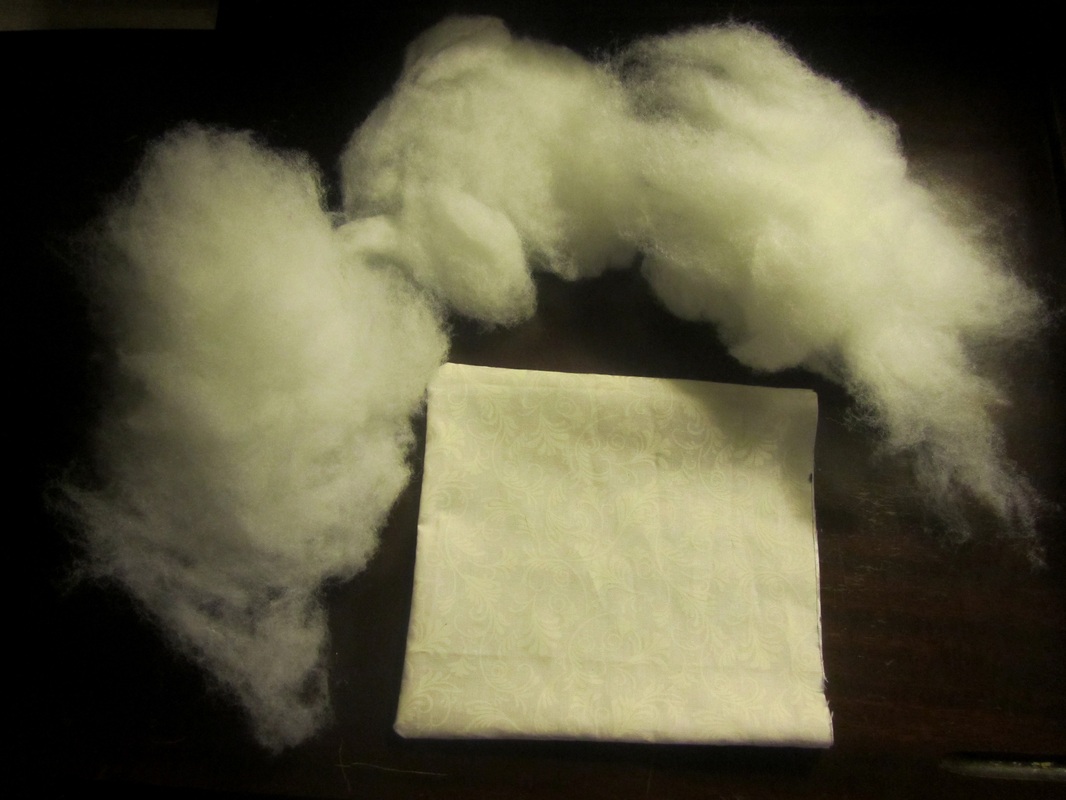
Step 5: When the pillow is filled to your satisfaction of fluffiness, fold the raw edges of the open side of the pocket inward and sew them closed. This is tricky with the bulk of the cotton but it is possible; and I think, worth the neatness.
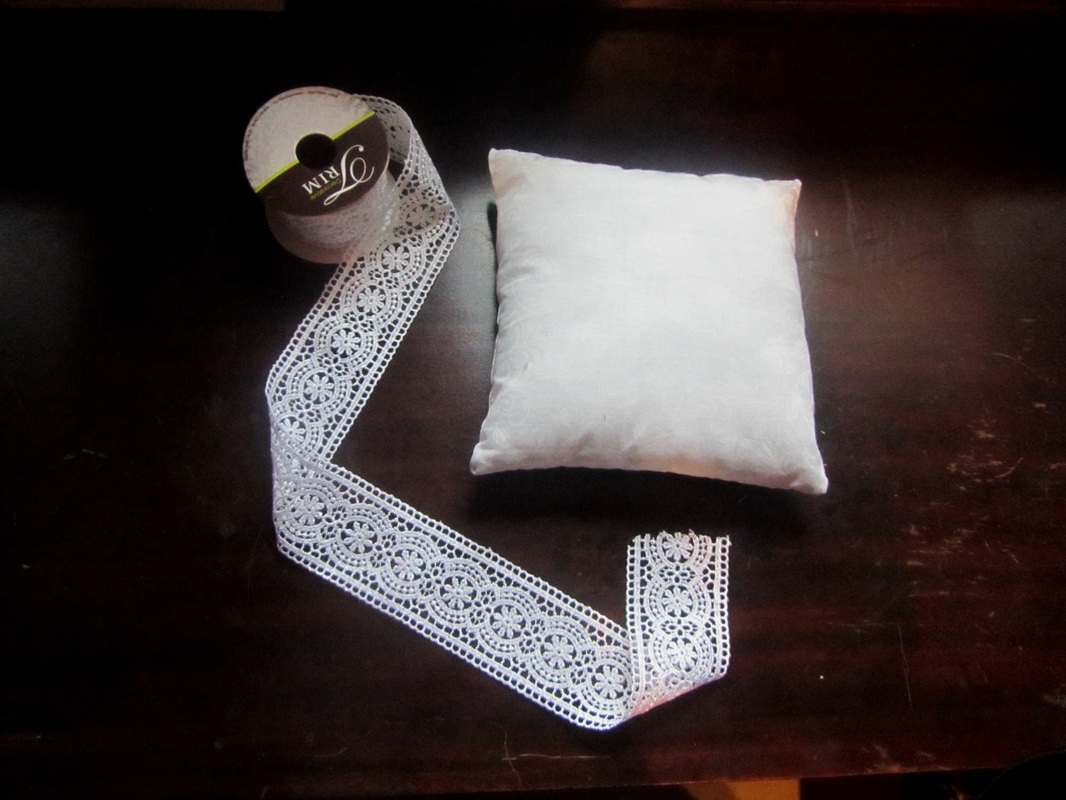
Step 6: Cut 2 lengths of lace ribbon (or other two inch wide adornment, be it plain ribbon or fabric) to fully encircle the pillow with a little bit of overlap. For the 7” pillow mine were slightly over 14”. (I used this same ribbon to edge my flower girl basket.)
Step 6: Cut 2 lengths of lace ribbon (or other two inch wide adornment, be it plain ribbon or fabric) to fully encircle the pillow with a little bit of overlap. For the 7” pillow mine were slightly over 14”. (I used this same ribbon to edge my flower girl basket.)
Step 7: Wrap one of the lengths of ribbon flat around the pillow, with the overlapping ends in the center of the back side of the pillow. Center the ribbon and pin in the desired position.
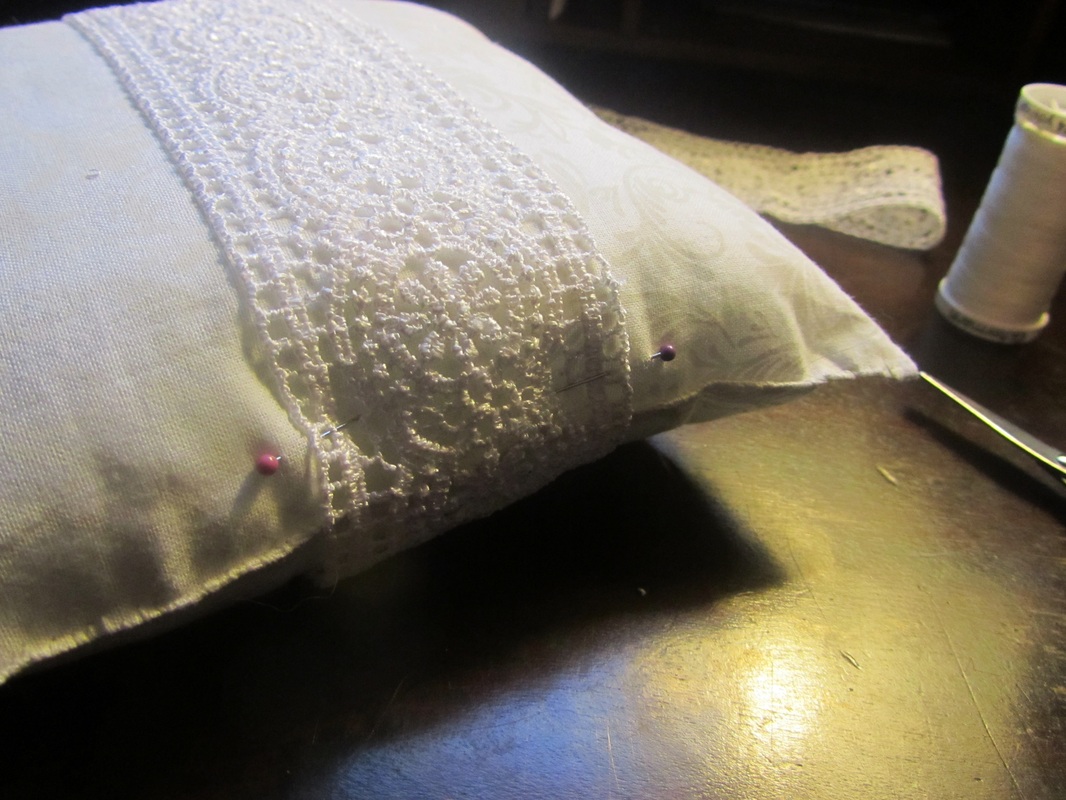
Step 8: Sew the overlapping ends together and tack to the back of the pillow to keep it in place.

Step 9: Flip the pillow over and find the desired center of the ribbon. Pinch the ribbon into an accordion shape and whip stitch it together so you have what looks like the sides of a bow.
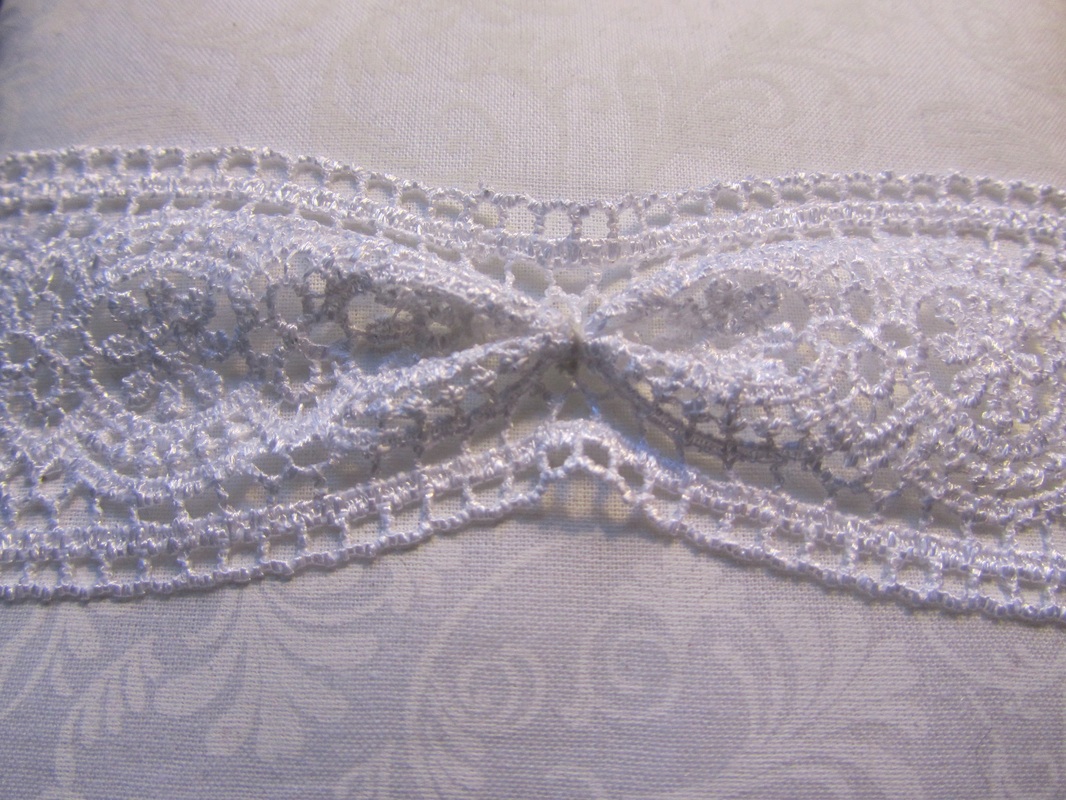
Step 10: Put the second length of ribbon perpendicularly over the first and repeat Steps 7, 8 and 9.
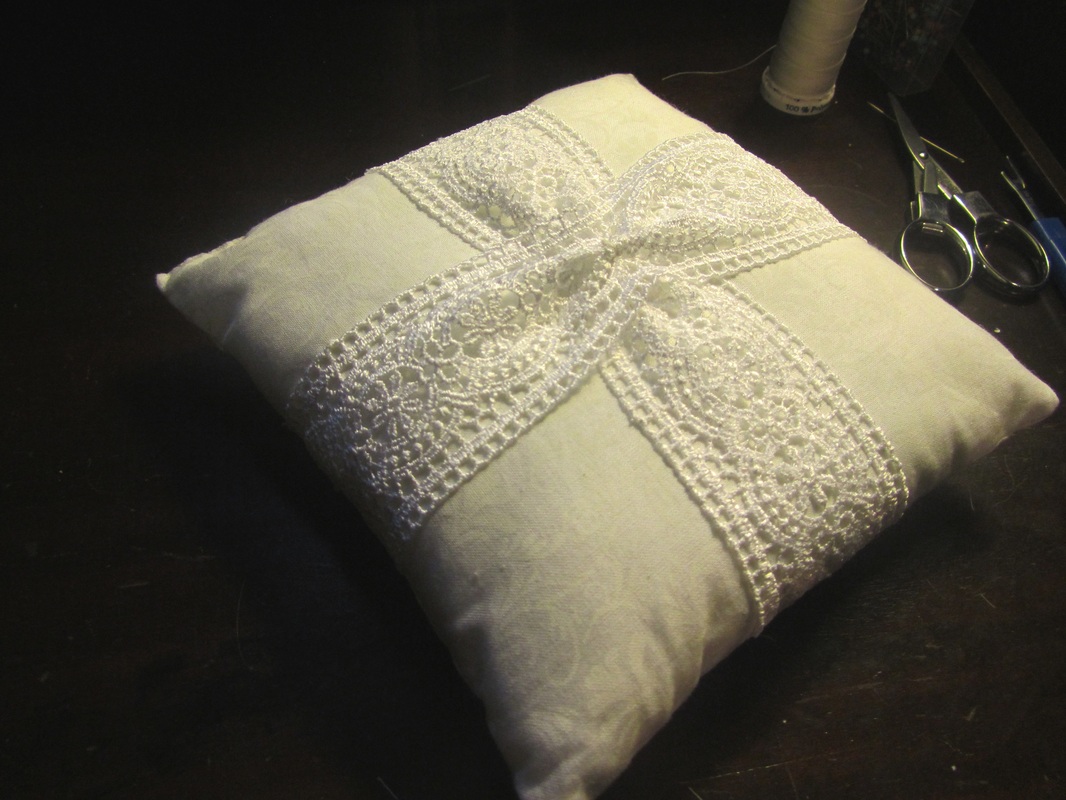
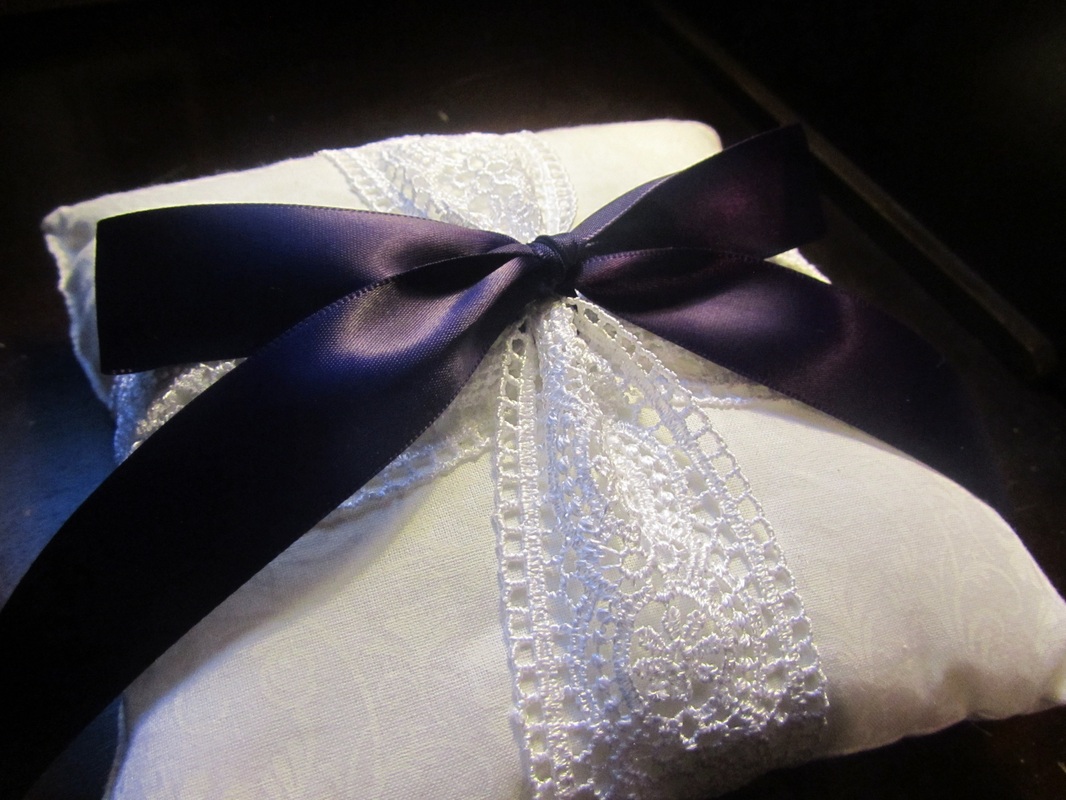
Step 11: Cut a length of thinner and/or colored ribbon (I used purple, the main color for my wedding theme. Additional perk: the purple I found in the sale bin at the local craft store!) and tie a proper bow at the center of the top lace ribbon. On the big day, undo the the bow and retie it with the rings strung into the center.
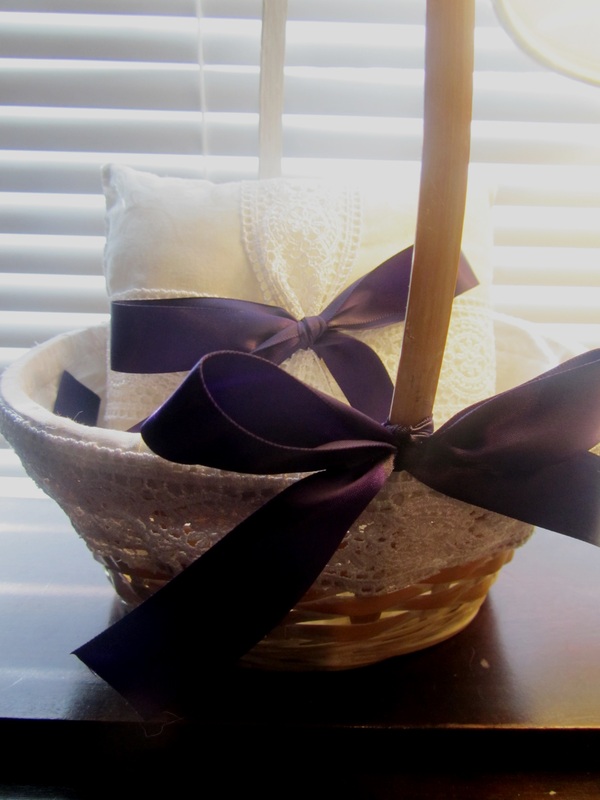
Here's a picture of the ring pillow and flower girl basket together. I even have a decent amount of the wide ribbon and TONS of the purple ribbon left over - indeed, I used the purple on my candle holder centerpieces as well. DIY wedding projects aren't always cheaper than just buying pre-made, but it can be if you're clever about it. Never overlook the value of sale bins, at home scraps and mothers' basements!
Happy crafting!
Happy crafting!
 RSS Feed